OPC to Excel: Writing OPC data to ExcelExcel has built-in tools for getting OPC data. All you have to do is specify the formula like this for a cell: =myserver|mytopic!myOPCitem where: myserver - OPC server name; mytopic - topic name; myOPCitem - OPC tags name. Once the item is updated on the server, it will be automatically updated in Excel. This method has a few drawbacks:
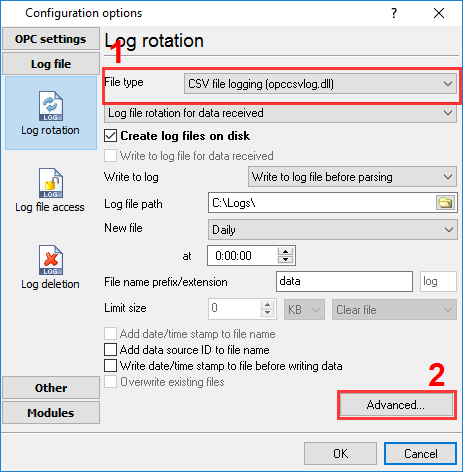
Our program offers an alternative way to generate files that can be opened in Excel, and that will contain the history of value changes. 1. You should add the necessary OPC tags the way it is described in the "Writing OPC to MSSQL" section (fig. 1-3) 2. Enable writing the received data to a log file of the CSV format (fig. 1). By default, the program generates files in the Excel format. You can customize the format of the CSV file if you click the "Advanced" button.
Note 1. You should take into account that the "C:\logs" folder must be available for writing. Do not try to write log files to the root folder of the C:\ drive, the "Program Files" folder of the "Windows" folder. Starting from Windows Vista, only the Administrator can write to them. Note 2. If you use the program as a Windows service, by default, the service will be run by the system account that has restricted permissions to create and write files. Related articles: OPC to Excel: Writing OPC data to Excel
OPC and DCOM Configuration on Windows 2008 and Windows 7
OPC and DCOM Configuration on Windows 10, 11, Windows Server 2019, 2022
Advanced OPC Data Logger - Read more about:OPC Logger RS232 pinout and signals Cables and signals Data monitor cables |
|
